

How to use a map and compass: the whole sequence
At a signed trail junction, find the junction on your map and choose the next recognizable checkpoint. Orient the paper to the ground, measure the direction between those points and transfer it to the compass. Then look up and compare the indicated direction with the trail and terrain.
A bearing gives a direction; it does not establish your starting position or prove that a straight line is passable. Before leaving a junction, check the expected distance and the features you should pass. If you cannot confidently place yourself on the map, use the location-finding section below before measuring a route.
Locate yourself. Match a known junction, bridge or other distinctive mapped feature to the ground.
Orient the map. Turn the paper so its directions agree with the terrain, with declination set.
Measure A to B. Join your position and next checkpoint with the baseplate edge. Set the bezel against the correct north lines.
Face the bearing and check the route. Turn yourself with the compass, choose a visible target and follow a safe route while tracking distance.
We recommend learning this sequence in an open, familiar place before using it on a remote hike. A class with an instructor lets you check your technique while mistakes are easy to correct.
Compass parts and magnetic declination
Use a topographic map covering the route and possible exits, a baseplate compass with a rotating degree bezel, and a pencil. Protect the paper from rain. Confirm that the map shows a scale and identifies its north reference; an unlabeled cropped screenshot can leave both uncertain. Our topographic map reading guide explains contours, scale and terrain matching.
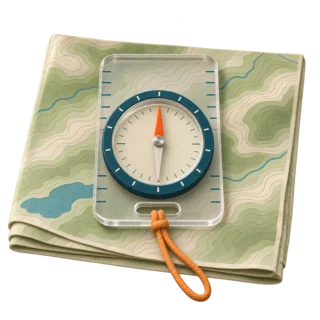
Moving magnetic needle
Its north-seeking end responds to Earth’s field. Check your manual to identify that end; color conventions can vary.
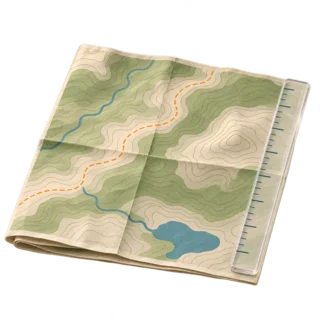
Baseplate and travel arrow
The straight edge joins two map points. The direction-of-travel arrow is fixed to the baseplate and points toward your target.
The bezel is the numbered ring you turn. Read a bearing at the fixed index beside the travel arrow. Inside the capsule, orienting lines help align the bezel with map north; the orienting arrow is the reference you match to the needle in the field. These parts are illustrated in the Suunto baseplate compass manual.
True north, grid north and magnetic north
True north follows a longitude meridian toward the geographic North Pole. Grid north follows a map’s rectangular coordinate grid. Magnetic north is the direction the north-seeking needle points locally. These directions can differ. Read the north diagram instead of assuming that every vertical map line has the same reference.
Setup for the main instructions: use true-north meridians or a border identified as true north, and set an adjustable compass to the current local magnetic declination using its manual. Get the value for your route and date from the NOAA calculator. Leave that adjustment set while turning the bearing bezel.
If your map only offers grid north lines, use the grid-to-magnetic correction appropriate to that map. A true-to-magnetic value alone does not account for grid convergence. Orienteering maps may instead show magnetic north lines, used with an unadjusted compass. Our magnetic declination guide explains the references and both adjustment methods.
If your compass has no declination adjustment
Keep its correction at zero. Measure a true map bearing, then convert it to magnetic before following it: subtract east declination or add west declination. For a magnetic field reading going back to a true-north map, reverse those operations. Keep results within 0–359° by adding or subtracting a full circle when needed.
For example, a teaching value of 10° east turns a 070° true map bearing into 060° magnetic. An unadjusted 060° magnetic field reading converts back to 070° true. These are invented practice values, not a correction for any destination. Label your notes “true” or “magnetic.”
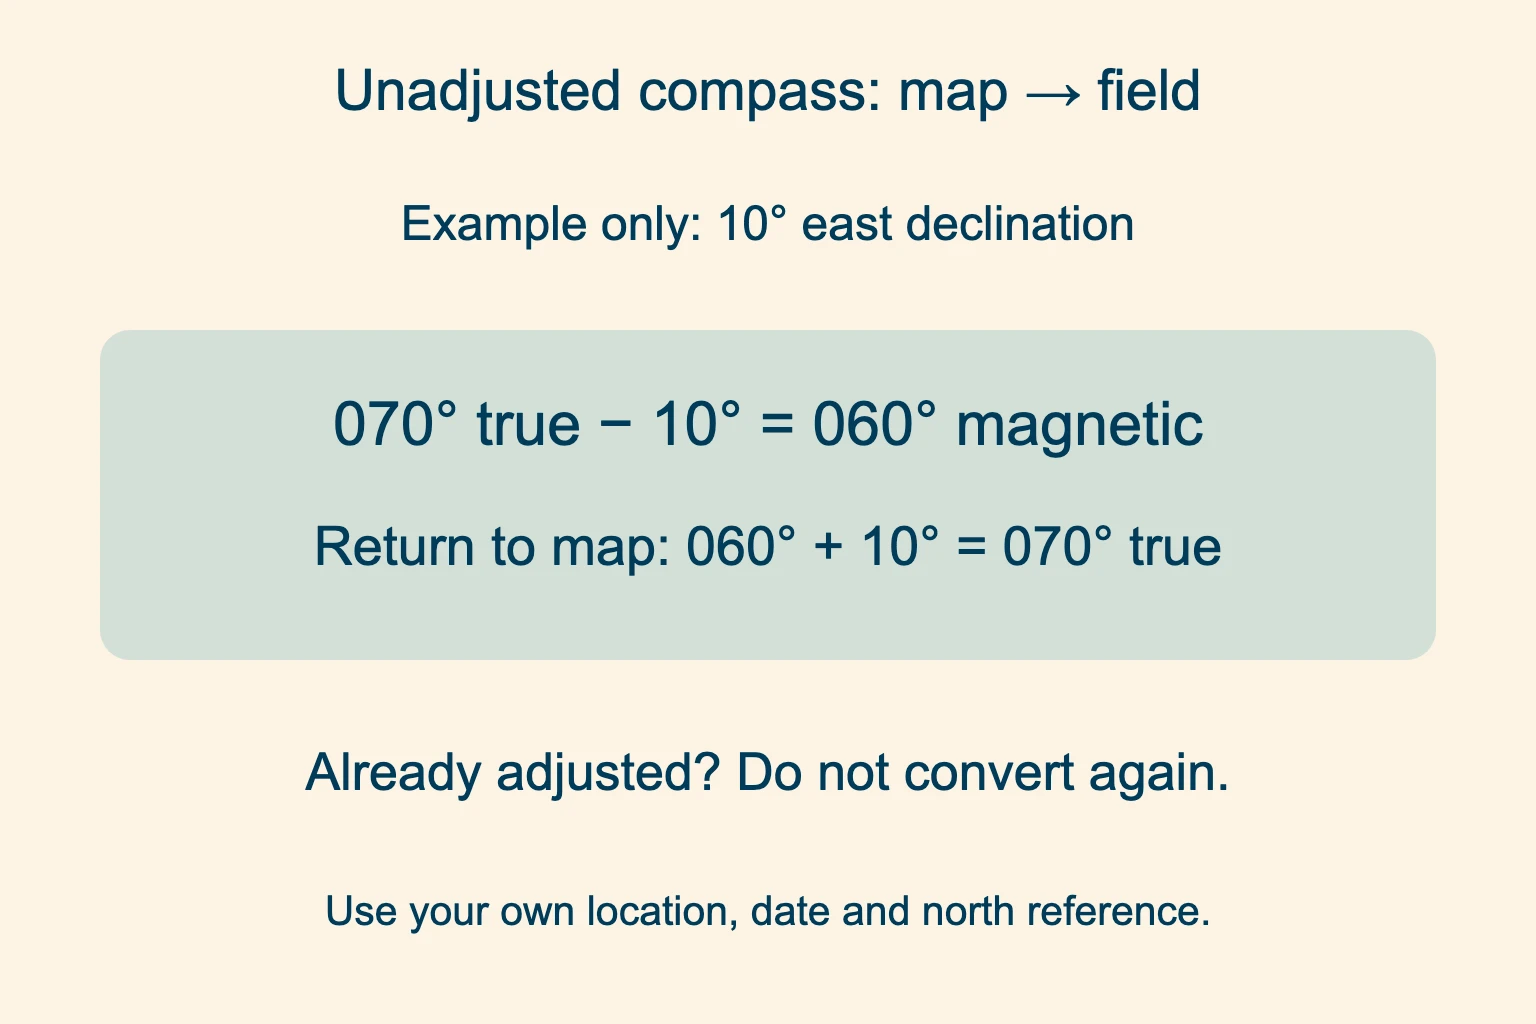
Map to unadjusted compass. Subtract an east angle from the true bearing. Add a west angle.
Unadjusted compass to map. Reverse the conversion before plotting against true-north lines.
Apply the correction once. The remaining main steps assume an adjustable compass already set for true north. Do not also add or subtract declination. With an unadjusted compass, use the conversions above at each transfer between map and field.
Orient the map with your compass
Orienting means turning the paper until the mapped features lie in the same directions as the features around you. It makes the map easier to interpret. It does not locate you by itself.
Place the baseplate on a true-north line. Use a suitable north–south border or meridian. Point the travel arrow toward the map’s north end.
Set bezel north to map north. Turn the ring to north at the bearing index. Keep the baseplate edge on the chosen line.
Turn the paper and compass together. Hold them level and steady relative to each other. Rotate both until the north-seeking needle aligns with the adjusted orienting arrow.
Now check a visible ridge, valley or trail against the map. The bezel’s north mark follows the map’s true north, while the shifted orienting arrow accounts for the needle’s magnetic direction. USGS describes this distinction for an adjusted compass.
Move away from phones, magnetic closures, vehicles and metal structures before reading the needle. Do not set the compass on a car hood or a metal picnic table. Repeat a reading from another position if interference seems possible.
How to take a bearing from a map
A map bearing is the clockwise angle from the chosen map north to your destination. On a degree compass, north is 0° or 360°, east 90°, south 180° and west 270°. The following method measures a true map bearing with the setup above.
Join the start and target. Place one long baseplate edge through A, your known location, and B, your next checkpoint. The travel arrow must point from A toward B.
Turn only the bezel. Keep the baseplate still. Make the capsule’s orienting lines parallel to true-north meridians, with bezel N toward map north.
Read the fixed bearing index. The number beside the travel arrow is your true bearing. Record it with the checkpoint and distance.
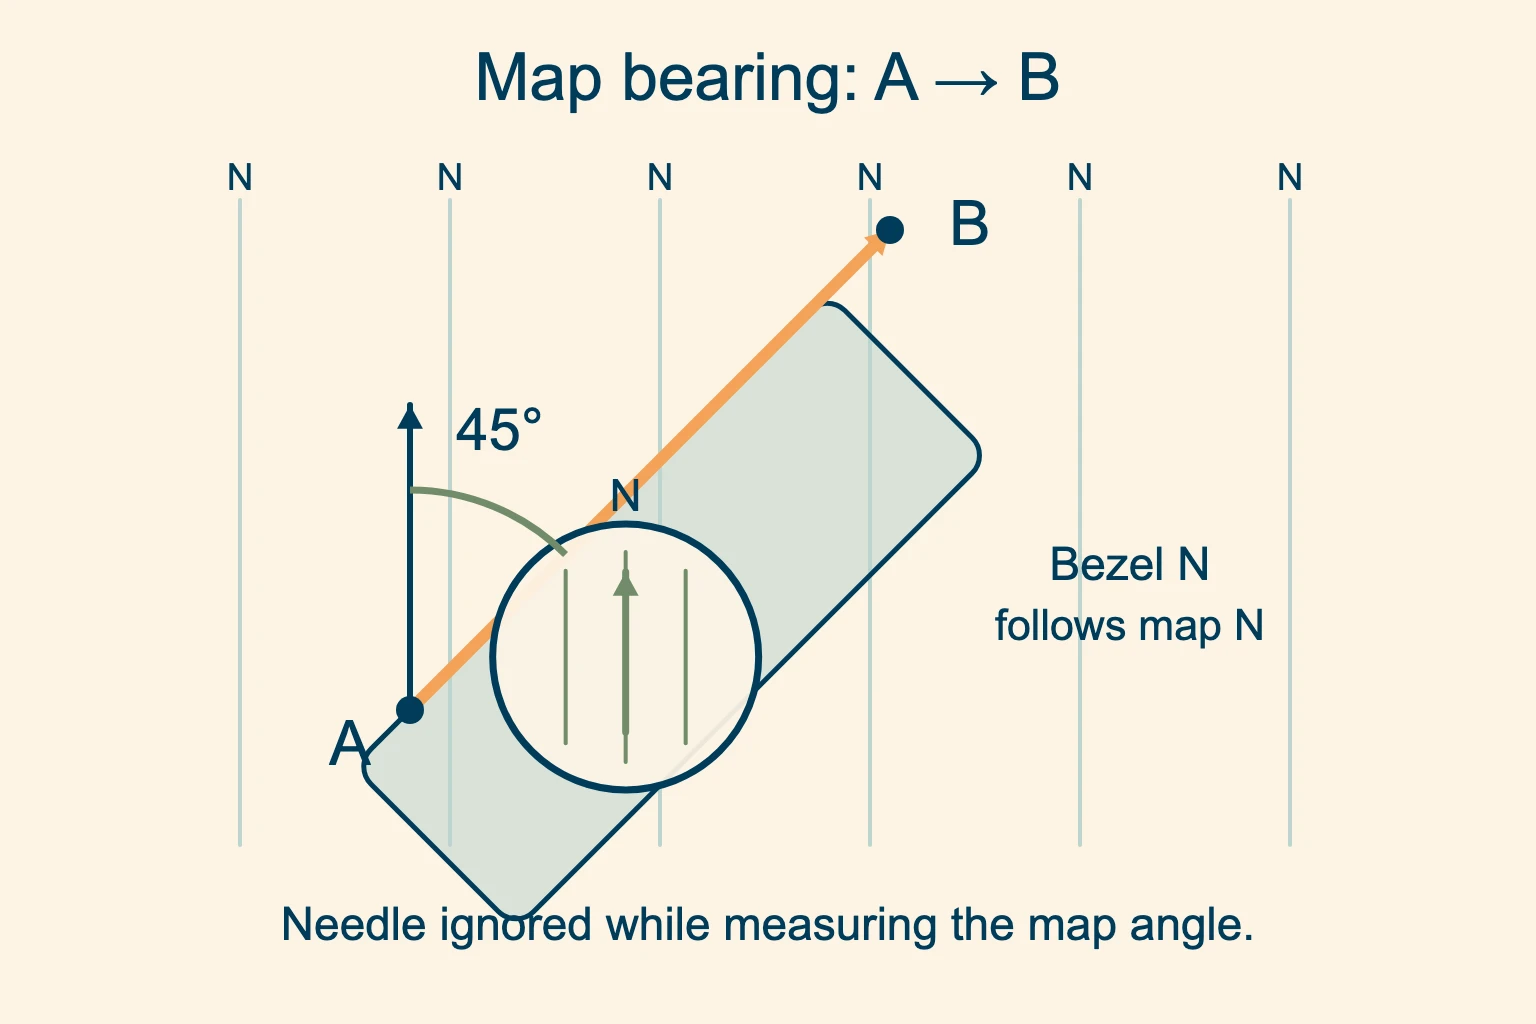
Baseplate stays on A→B. Turning the bezel does not change where the baseplate’s travel arrow points.
Keep bezel N toward map north. If bezel N faces map south, the bearing will be off by 180°.
You can measure this angle with the paper facing any direction, because you are using the compass as a protractor. The needle may point somewhere unrelated to the printed north while you do it. Do not turn the ring to chase the needle during this step.
Before lifting the compass, inspect the route between the points. A cliff, stream or private boundary may make the direct line unsuitable. Choose checkpoints along a safe, permitted route rather than treating B as permission to walk straight there.
How to follow a bearing on the ground
To follow a bearing, leave the measured number set on the bezel. Hold the compass level in front of you with the travel arrow pointing away from your body. Turn yourself and the whole compass until the needle’s north end sits in the adjusted orienting arrow. The travel arrow now indicates the direction to face.
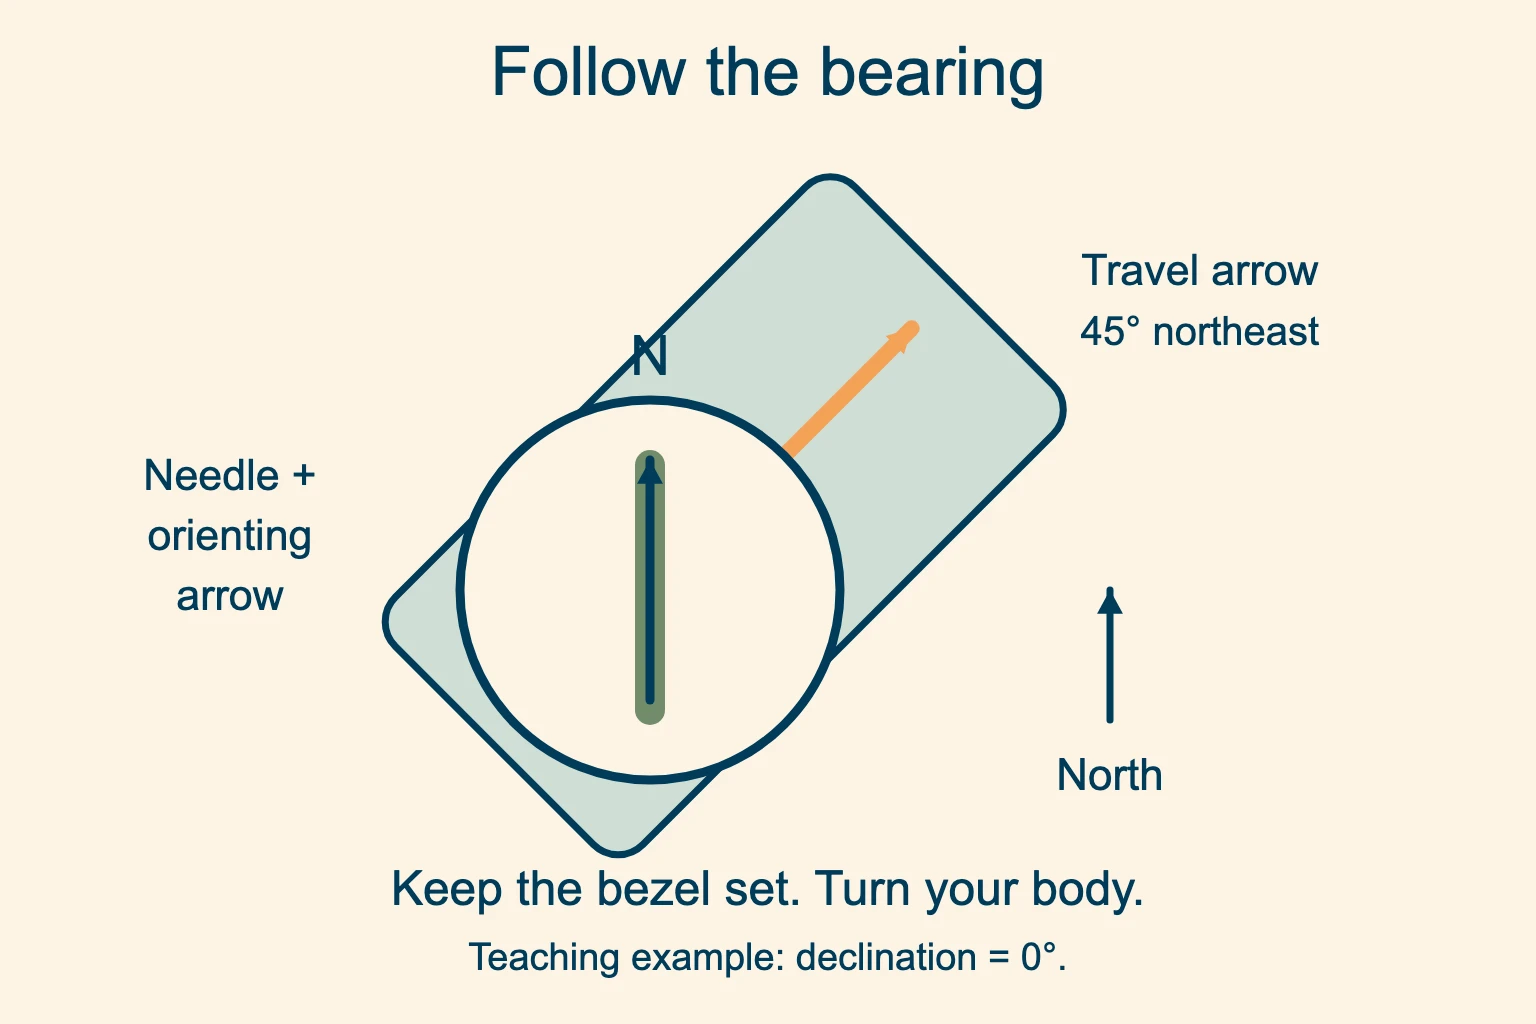
Keep the number set. Turn your body to align the needle. Turning the bezel instead would replace the bearing you measured.
Look up and pick a target. Choose a distinctive visible object on the indicated line, then walk safely to it and sight again.
Use a particular tree, rock or other clear intermediate target. Put the compass away while negotiating rough footing, then stop safely to recheck. Staring down at the needle while walking makes it easier to miss a hazard.
Pair direction with distance and checkpoints
Measure each leg using the map’s scale bar, especially on a resized print. At 1:24,000, one inch represents 2,000 feet: 24,000 inches divided by 12. A bent strip of paper can measure successive bends of a trail; a straight A→B measurement gives only the direct distance.
Note the features you expect before the checkpoint and one recognizable feature beyond it that would tell you you have gone too far. A signed junction may serve as a checkpoint; a mapped road beyond it could tell you that you have passed the junction. Choose features that actually exist on your map and can be recognized on the ground.
If you detour around an obstacle, resuming the old bearing can leave you on a parallel line that misses the target. From a new, confidently identified position, measure a new leg. If the obstacle or visibility makes that impossible, stop and reassess instead of improvising a crossing.
Take a field bearing to a visible landmark
To measure the direction of something you can see, hold the compass level and point its travel arrow directly at that landmark. Keep the baseplate aimed there while turning the bezel until the north-seeking needle aligns with the orienting arrow. Read the number at the fixed index.
With our adjusted setup, that reading is a true bearing. With an unadjusted compass, it is magnetic and must be converted before plotting against true north. You can take a field bearing without a map, but naming the landmark on the paper requires separate identification.
A broad ridge is easy to confuse with its neighbor. Use a distinctive summit, tower or other precise feature you can identify on both the map and the ground. Stay in the same place when collecting several bearings to estimate a position.
Map and compass triangulation: find your position
Guides often call this triangulation. More precisely, taking bearings to known landmarks to estimate your own position is resection. Each bearing places you somewhere along a line extending back from the mapped landmark. The US Forest Service’s Basic Land Navigation, chapter 6, illustrates these lines of position.
Identify a landmark confidently. Take a field bearing toward it and keep that number set. Use the same north reference as the map.
Plot the line back toward you. Place a long baseplate edge through the mapped landmark. Rotate the entire compass on the paper until bezel north and its lines agree with true map north.
Check the travel-arrow direction. The travel arrow points toward the landmark along that line. Draw along the edge from the landmark backward toward your likely position.
Repeat from the same standing point. Use a second landmark well separated in direction, then a third as a check. Compare the crossing area with the terrain.
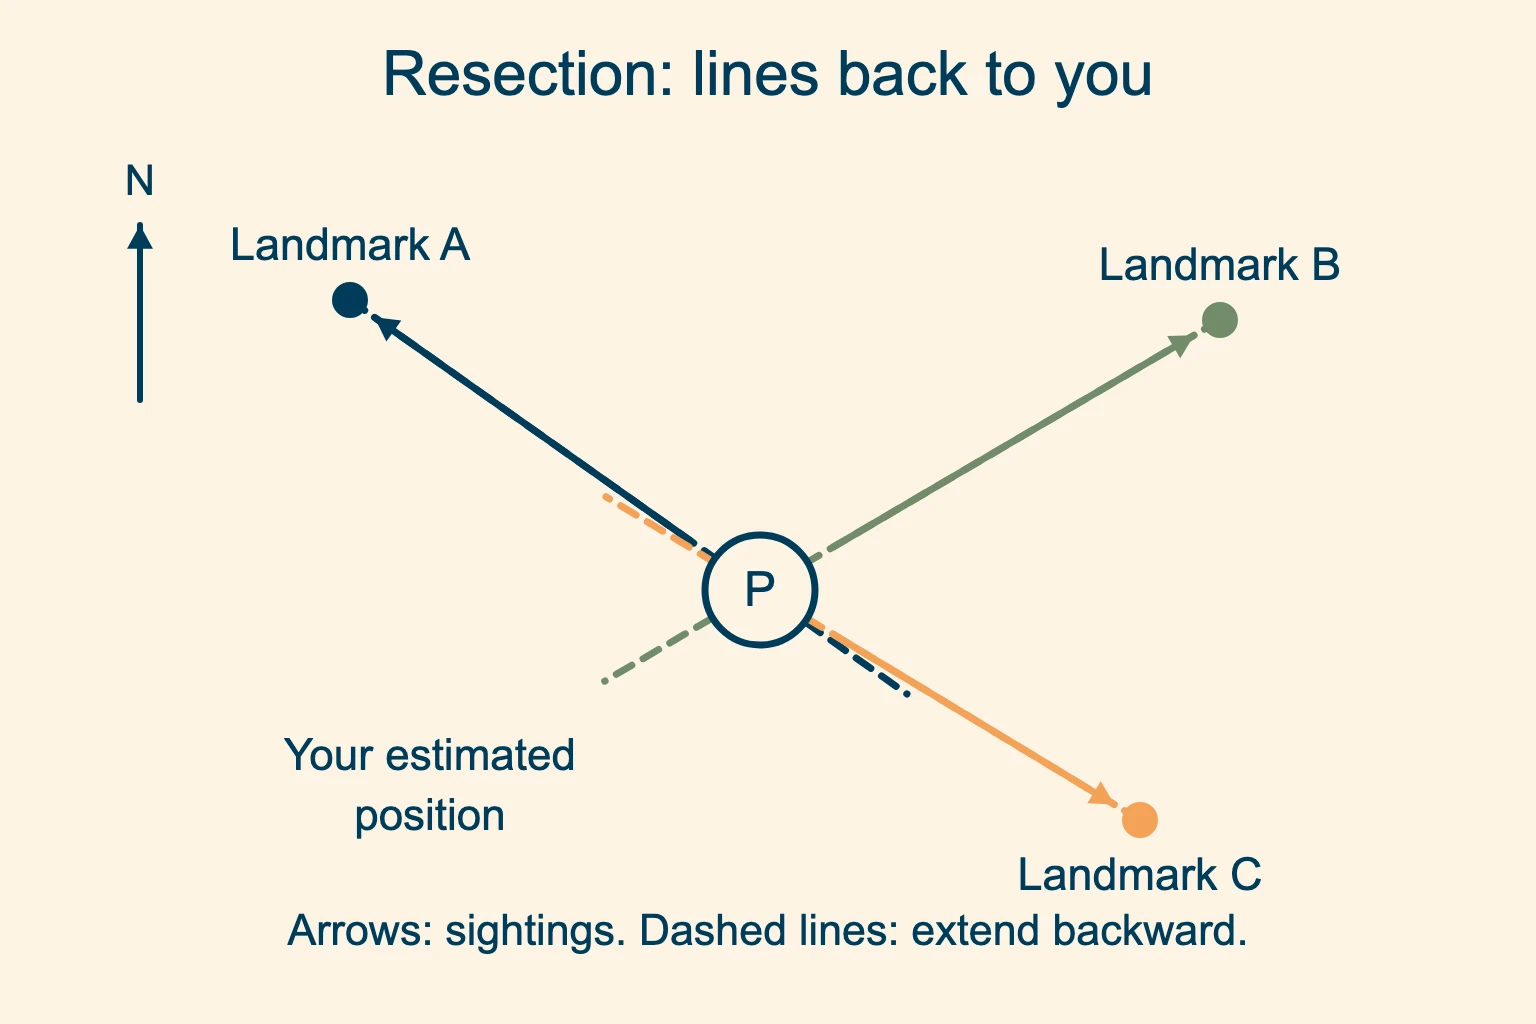
Spread the landmarks around you. Nearly parallel or opposite sight lines make the intersection sensitive to small reading errors.
Treat the result as an estimate. Real readings may form a small triangle. A large disagreement means you must recheck the landmarks and setup.
For the plotting method above, keep the original bearing set; you are extending its line backward. Do not also turn the bezel through a half circle. That extra reversal would mix two different plotting methods.
Two well-crossing lines give a candidate position. A third can reveal a misidentified landmark or a poor reading. You may not be inside the triangle the lines form. Check whether the estimated area agrees with your trail, elevation and surrounding landforms. A large triangle is not a location you can confidently navigate from.
If you know you are on a particular mapped trail or other linear feature, one reliable sight line may narrow down your position where it crosses that feature. Multiple crossings or a doubtful trail identification leave ambiguity. Do not force an answer just because two lines meet on paper.
How to take a back bearing
A back bearing points in the opposite direction to the original bearing. Add 180° if the original is below 180°; otherwise subtract 180°. Keep the same north reference. For example, 045° true becomes 225° true.
A back bearing reverses a straight leg. It does not reverse every bend or detour you walked, and it does not prove that your current position is on the original line. Keep route notes and checkpoints if you may need to return. Plotting a resection line backward with the original bearing, as above, already handles the reversal geometrically.
When the compass and terrain disagree
Stop in a safe place. Check whether the baseplate was pointed from the start toward the target, whether bezel N faced map north, and whether you aligned the needle’s north-seeking end. Then check the declination setting and map reference. A wrong needle end or a reversed baseplate can send you in the opposite direction.
Move away from magnetic interference and repeat the reading. If the compass stays inconsistent away from interference, do not rely on it. Use a known-good backup and reassess your position with the map and other available navigation tools.
Fog and dense vegetation can hide the landmarks needed for resection. A compass does not reveal unseen cliffs or confirm a safe crossing. If you are lost, stop moving, assess the situation and conserve your resources. Seek help when needed; move only for a clear safety reason or when a safe return route is certain. The National Park Service’s lost-person guidance explains what to do.
A map and compass practice session
We suggest starting at a known point in a familiar open area with safe access and a clear view. Use a map detailed enough to show the features you choose. Stop before checking the compass.
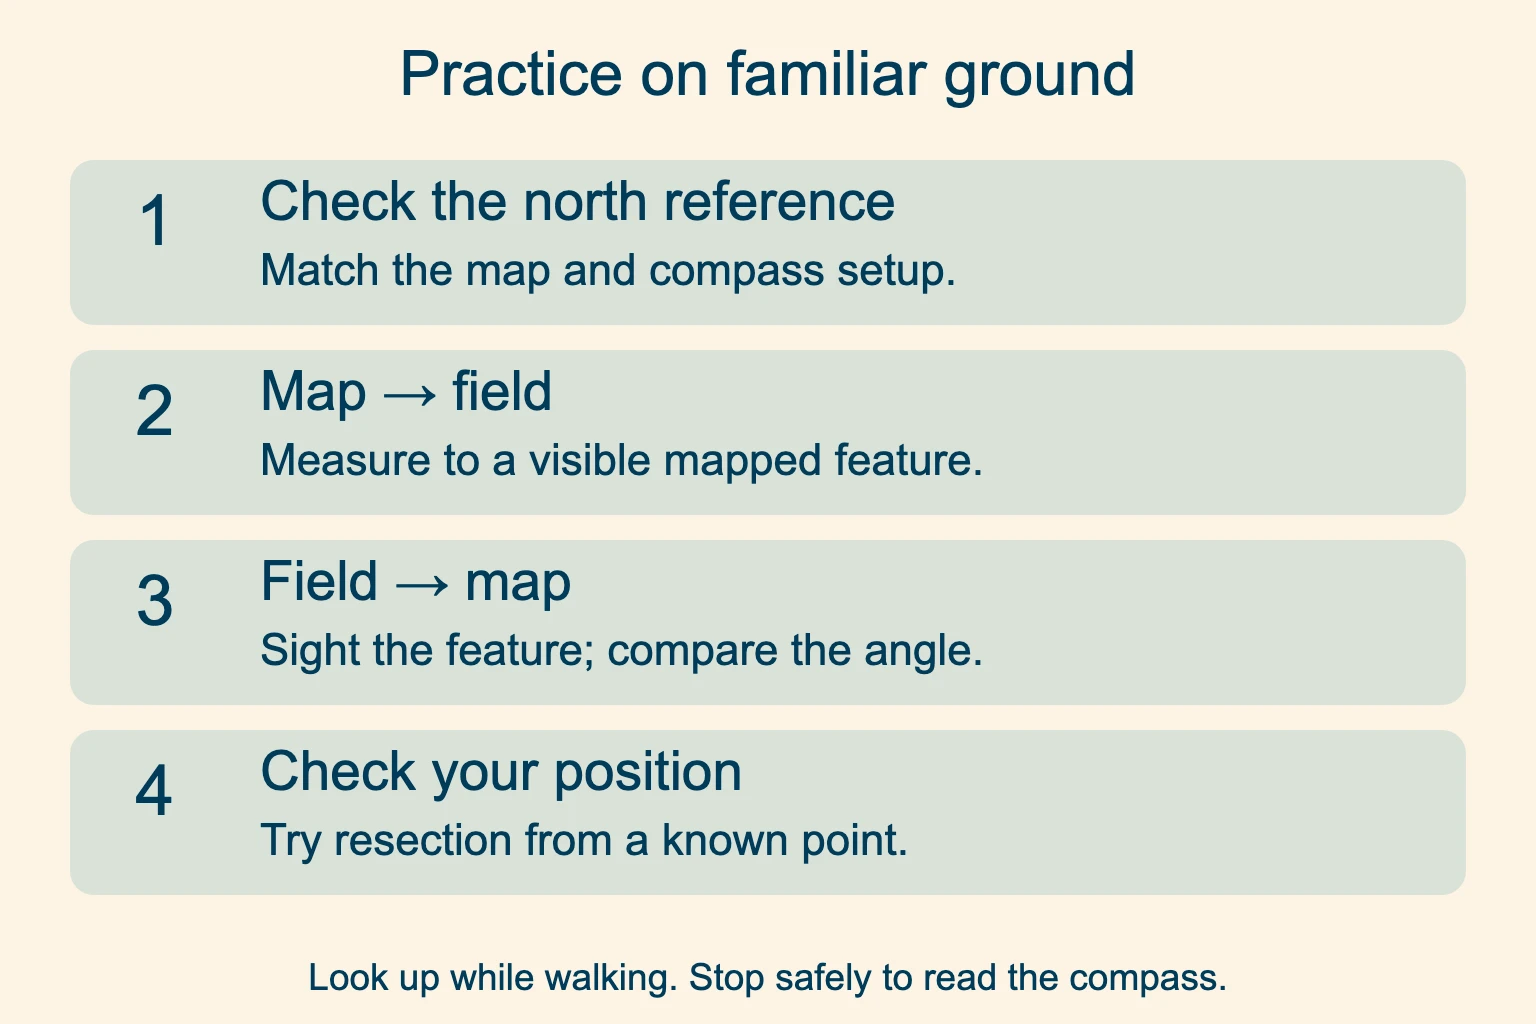
Compare map and field. Measure to a mapped visible feature, then sight it. Investigate a large disagreement before walking.
Try resection from a known point. Plot bearings to identifiable mapped landmarks and compare the crossing area with your actual location.
Walk a short safe leg to a visible checkpoint, comparing the expected features with the ground. Record the bearing and distance. Then work out the back bearing and check its direction from the endpoint. An instructor or experienced navigator can check mistakes you may not notice yourself.
Map and compass questions
How do I use a compass to read a map?
Identify the map’s north reference, handle its magnetic correction and orient the paper to the ground. Match visible features to the map to locate yourself. Then measure a bearing from that position to a suitable checkpoint and compare it with the terrain before moving.
What does bearing on a compass mean?
On a degree compass it is an angle measured clockwise from a stated north reference. East is 90°, south 180° and west 270°. A true bearing and a magnetic bearing can have different numbers for the same direction, so label which one you use.
Can I use a compass without a map?
Yes. You can find magnetic north, take a field bearing to a visible object and follow a known bearing. Without a map or other reliable location information, the compass cannot identify where you are or show which direction leads to safety.
Do I need to orient the map before taking a bearing?
You can measure a map angle without orienting the paper: join your position to the target and align the bezel with the correct printed north lines. Orienting first makes terrain comparison easier and gives you a useful check on the result.
How do you use a map and compass for orienteering?
Use the map legend and event instructions to identify the north reference. Orienteering maps commonly use magnetic north lines, which match an unadjusted compass. The true-north correction used in this hiking example would introduce an error if added to that setup.
Where can I learn how to use a map and compass?
Start in a familiar open area where you can check each result against a known position. A navigation class with an instructor can help you spot errors in your grip, bezel setting or plotting before you depend on those skills on a remote trail.
Can triangulation give an exact location?
Handheld compass resection gives an estimate. Landmark identification, sighting and plotting all introduce uncertainty. Use well-separated landmarks, add a third reading and compare the result with terrain. Poorly crossing lines or a large disagreement are reasons to recheck, not to claim a precise position.
Practice before you need it. Choose familiar ground and match the paper to what you can see before attempting a remote route.