
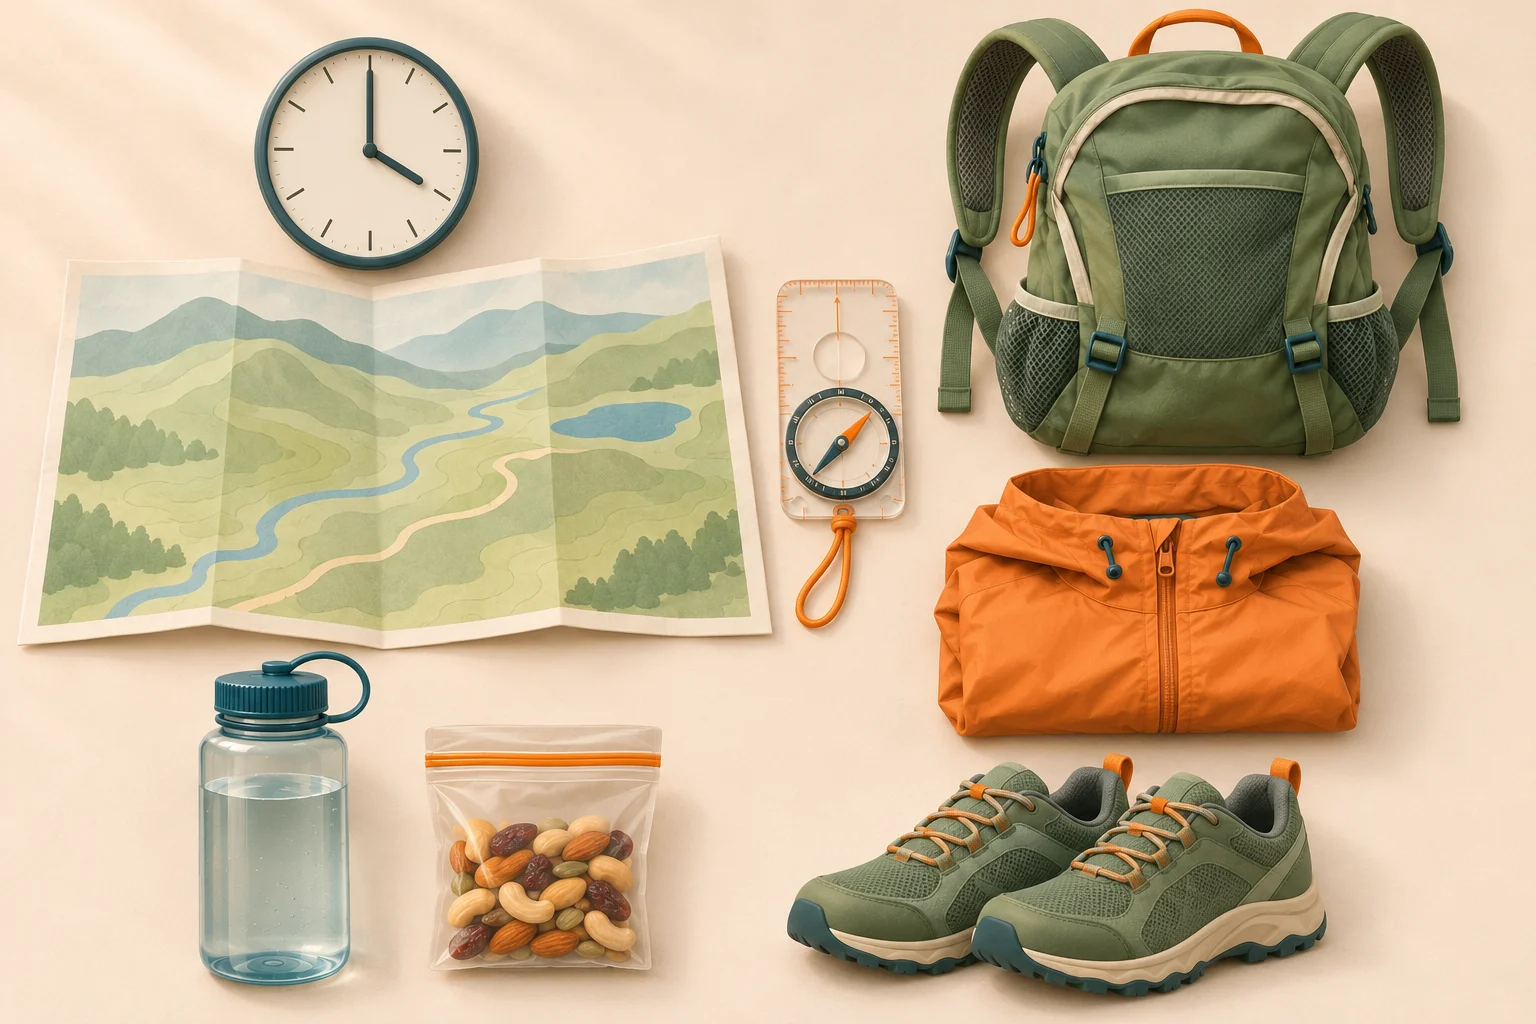
Hiking for beginners: how to start hiking
You can start on a local woodland path, a park nature trail or an accessible paved route. A mountain summit is optional. Choose an outing you can shorten if your shoes rub, the weather changes or someone has had enough.
Treat the first day as a test: notice how your feet feel, how the pack carries and how long you actually take on uneven ground. Finishing with energy left gives you useful information for the next trip.
Types of hiking: start with a day hike
A day hike starts and finishes the same day. Backpacking adds sleeping equipment, overnight food storage and a much heavier load. Thru-hiking means completing a long-distance trail from end to end; fastpacking combines fast travel with lightweight overnight gear. These types of hiking require different preparation. This guide covers a first daylight outing on an established trail.
Choose a beginner hike by terrain and elevation gain
An “easy” label is a starting point. Read the route description and look at its surface, total climb and hazards. A short rocky ascent can demand more effort and balance than a longer, nearly level path. Elevation gain is the sum of the uphill climbing; it is different from the highest elevation reached.

A useful first choice
A maintained, clearly signed trail with gentle grades, secure footing and straightforward junctions. Check that its length is within distances you already walk easily.
A reason to choose another
Unbridged crossings, exposed ledges, scrambling, snow or ice, or a steep climb back from the destination. Save unfamiliar hazards for a trip with the skills and support they need.
A loop ends where it starts without retracing the whole route. An out-and-back returns along the same trail, so you can turn around early. A point-to-point finishes elsewhere and needs return transport. Check which kind you have selected before following a mileage number.
Look at the elevation profile as well as the map. A trail that drops into a canyon puts the uphill work at the end, when you are more tired. If you cannot tell whether the route suits everyone, ask the land manager for a simpler alternative. The NPS Hike Smart guide emphasizes matching the outing to the whole group.
Find easy hiking trails near you
Start with your city or county parks department, state park website or a nearby national park’s trail list. A trail app can suggest possibilities, but open the land manager’s page before deciding. It is the place to check closures and access rules.
For easy hiking trails, narrow the search to one park and a route with published distance, surface and elevation information. Look for recent condition reports as additional evidence. A photograph of a viewpoint does not tell you whether the path is icy today.
Confirm the trailhead. Find the actual start, parking or transit stop, opening hours and any gate closing time. A place name can cover several entrances.
Read the access details. Check reservations, permits, fees, dog rules and whether toilets or drinking water are available. Save the official map.
Keep an alternative nearby. Choose a shorter open route before leaving. If the lot is full or the trail is closed, use that option without improvising an unfamiliar route.
Is hiking free?
Walking a trail may be free, while parking, entrance or permits cost money. Check the site’s current charges before traveling. Transport and equipment add to the outing too; there is no single national price.
A manageable first distance
There is no distance that suits every beginner. California State Parks’ beginner guidance offers 1–2 miles on easy terrain with little elevation gain as a starting point. Treat that as a conservative option to assess, especially if uneven ground is new to you. A shorter accessible path can be the right choice.
Use your recent comfortable walks as the limit for planning, then allow for the extra work of terrain and carrying a pack. Someone new to trails but used to long walks has a different starting point from someone rebuilding a walking habit. Neither needs to keep up with a stranger’s mileage target.
Check whether a listed distance is one-way or round-trip. A viewpoint 1 mile from the trailhead means 2 miles of walking if you return the same way. A 2-mile loop is already the full circuit.
Choose a route you can shorten. An out-and-back lets you turn around before the advertised destination. On a loop, identify any officially mapped shorter option before setting out; an apparent shortcut may be a different trail.
How to plan a hike and the return
Write down the whole trip, including how you get to and from the trailhead. Start with the route description’s time estimate, if one is provided, and compare it with your group’s experience. Add breaks and room for delays. You will learn more from your own first easy outing than from assuming everyone walks at one fixed speed.
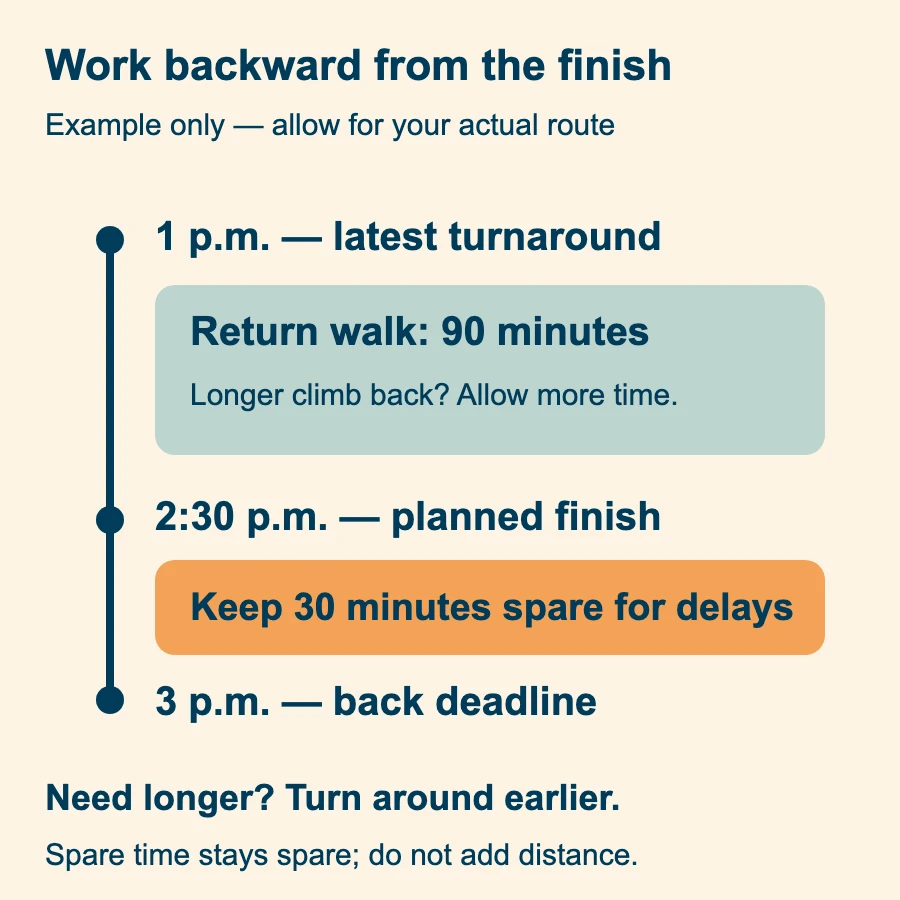
Set a back-at-the-trailhead deadline. Account for daylight, gate hours, transport and the forecast. Leave room before those limits.
Choose a turnaround time. Subtract a realistic return allowance and your spare time. Return climbing may take longer than the outward descent.
Reassess as you go. Turn back earlier if progress is slower, supplies are insufficient or someone is struggling. Treat the turnaround time as a deadline.
Keep the return in your time calculation. Suppose your group needs to reach the trailhead by 3 p.m. You allow 90 minutes for the way back and keep 30 minutes spare. That makes 1 p.m. the latest turnaround in this example: 3 p.m. minus two hours. If the return needs longer, the turnaround must be earlier.
How to prepare for a hike: leave a trip plan
Send a trusted contact the trail name, trailhead, intended route, party members and expected return. Agree when they should raise the alarm if you fail to check in, and which local agency to contact. Tell them when you finish. A plan left only in your parked car does not give someone at home a clear reason to act.
Check weather and decide when to cancel
Use the forecast for the trail area and elevation, plus official closure and hazard notices. For a first hike, choose another day if warnings, dangerous heat, flooding, snow or ice exceed your preparation. Pack rain protection even when the morning looks clear.
Plan around lightning. The National Weather Service says to move immediately to a substantial building or enclosed metal-topped vehicle when you hear thunder. Stay in safe shelter for at least 30 minutes after the last thunder. A tree, tent or open shelter is not safe lightning protection. If storms are forecast, postpone the outing so you can stay near safe shelter.
What to bring hiking
Begin with a comfortable daypack you already own. Check its straps and closures, put the load inside and try walking with it before the trip. Borrowing suitable equipment is reasonable; make sure you know how it works. The destination and forecast determine what you need.
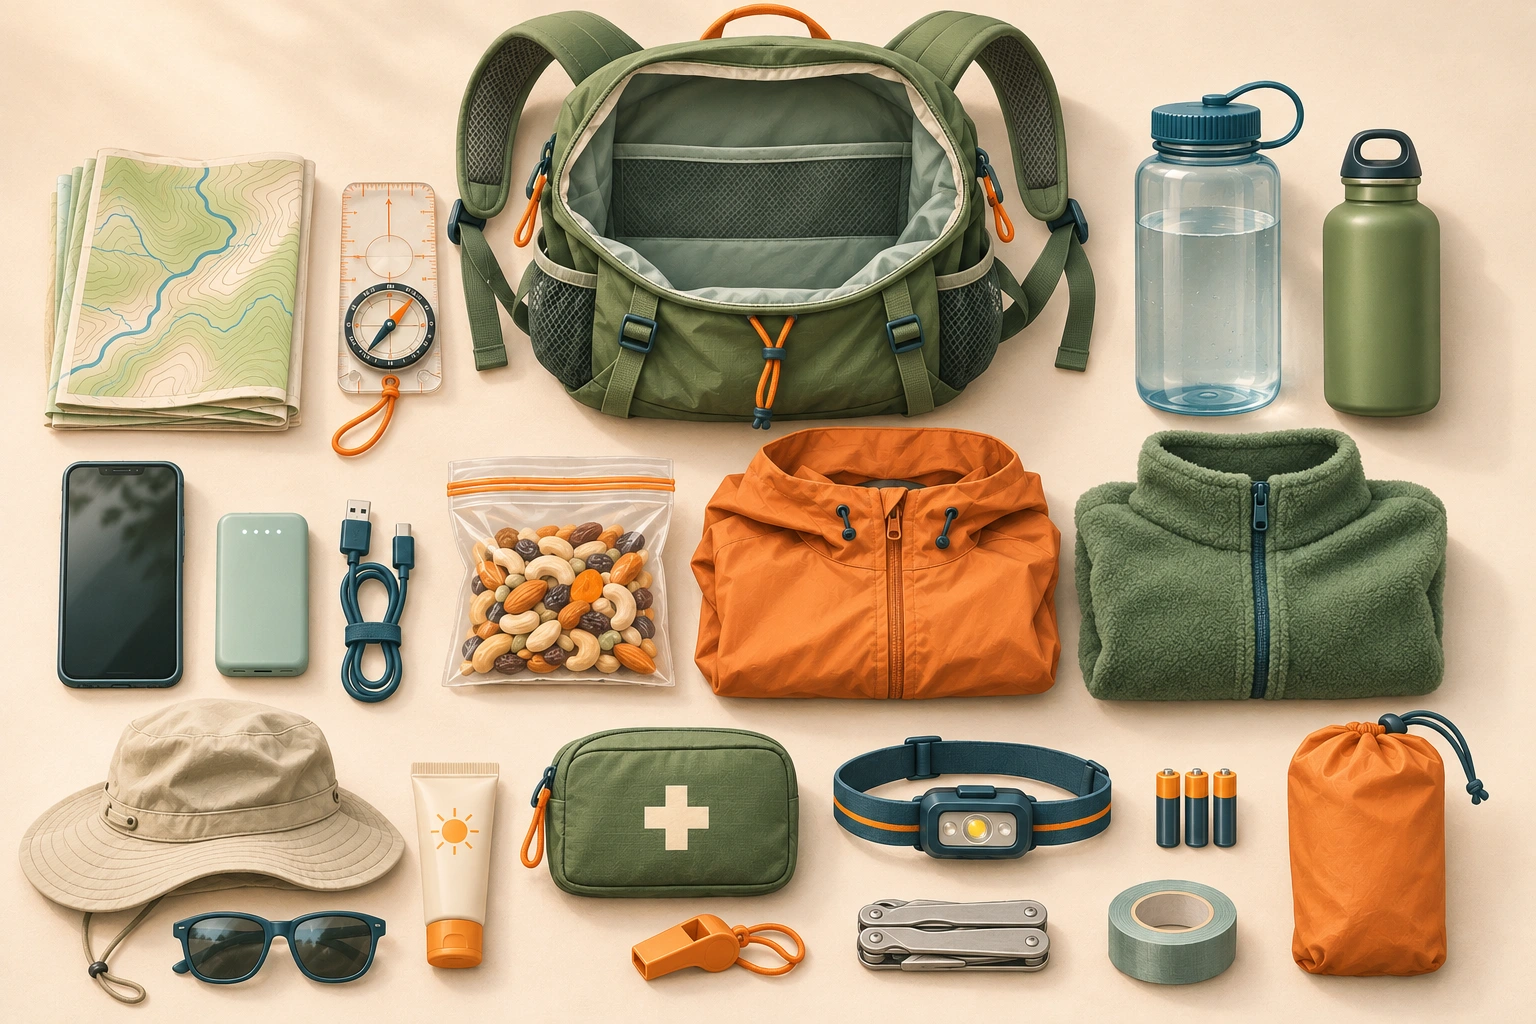
Navigate without a signal. Download the trail map, test it offline and carry a paper backup with a compass you know how to use. Keep your phone charged and protect it from water.
Carry water and ready-to-eat food. Plan for the full outing and delays. For a first short hike, carrying all the drinking water avoids relying on an uncertain refill.
Prepare to be out longer. Pack extra clothing, sun protection, a headlamp with spare power, first aid and personal medication, repair tools, emergency shelter and permitted fire-starting supplies.
The NPS Ten Essentials organize equipment by purpose: navigation, protection from weather and the supplies needed during a delay. Check that your kit covers each category. Match the contents to the trip and local fire restrictions. A headlamp is useful even on a planned daytime walk.
Decide what to pack before buying specialist equipment. On a maintained easy path, much of the clothing and a small pack may already be in your cupboard. Safety gaps still need filling. Leave heavy duplicate gadgets and valuables at home; keep the things that protect you if the day runs late.
Water needs change with exertion and conditions. Check the land manager’s advice and our water-planning guide instead of treating one bottle as enough for every hike. A stream on the map is neither a guaranteed supply nor safe drinking water without appropriate treatment.
What to wear hiking: three layers and footwear
Dress for the forecast and for a stop when you are no longer generating much heat. Quick-drying synthetic or wool clothing is useful; damp cotton and heavy denim hold moisture. Keep rainwear accessible so you can put it on before you are soaked.
Use three layers as conditions change
Three layers means a moisture-managing base layer, an insulating middle layer and an outer shell for wind or rain. You adjust the combination as conditions change. Carrying three layers does not mean wearing them all while climbing in warm weather. The New York DEC hiking guidance explains clothing and preparedness for changing conditions.
Check that you can take a high step and bend your knees freely in your clothes. Check for rubbing under pack straps. Add sun protection and weather-appropriate headwear. Test the complete outfit on a local walk, including the socks you intend to use.

Adjust before you overheat
Open or remove a layer as effort rises. Put warmth back on when you stop and cool down.
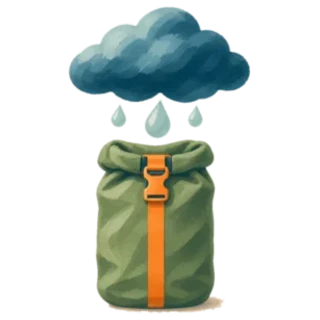
Keep the shell close
Store rainwear where you can reach it quickly. Keep spare clothing dry inside the pack.
Do you need hiking boots?
On easy, maintained trails, suitable walking or athletic shoes may be enough; California State Parks includes them in its beginner advice. Choose secure, comfortable footwear with grip suited to the surface. Rugged terrain needs a different assessment. Smooth soles, loose heels or painful toes are reasons to fix the setup before leaving.
Walk in the shoes beforehand and stop early if you feel a hot spot. New shoes are no reason to push on through pain. The next hike can wait while your feet recover.
How to train for hiking when you are out of shape
Choose a short, gentle outing within the walking you can already manage. If that is a local paved path, start there. Build a regular walking habit, then introduce gentle hills and your lightly loaded pack as those walks become comfortable. Try one change at a time so you can tell what makes the outing harder.
If you are out of shape, shorten the plan. Pause when you need to, keep a pace that allows conversation and turn around with enough energy for the return. If a health condition affects exercise, discuss the intended activity with your clinician.
To train for hiking, repeat a familiar manageable route and record how you felt afterward. When it feels comfortable, consider a small increase in distance or climb. Avoid changing both simply because an app calls the next trail easy. There is no required training timetable for every beginner.
Hiking alone, with a group or with kids
For a first outing, we recommend a companion who is happy with your pace. A ranger-led walk or an established local hiking group can also provide company. Ask about the actual route and whether the group waits for everyone before signing up.
Hiking alone leaves you without immediate help from a companion. If you choose it, stay within familiar abilities, use a straightforward maintained route and make the trip and communication plans especially carefully. Busy trails do not guarantee someone will be nearby when needed. Check coverage; an offline map cannot call for help.
When hiking with kids, plan around their interest and energy, with room to stop and turn back. Keep the group together at junctions and agree that nobody walks ahead out of sight. Let the slowest walker set the pace. Hiking with kids should not depend on carrying an exhausted child over terrain the adults cannot manage.
Agree before leaving
Everyone knows the route, return plan and who has the emergency equipment.

Plan stops together
Make time for snacks and checking how everyone feels.
Dogs need their own suitability check. Confirm permission, leash and waste rules with the land manager, and plan their water too. A trail suitable for you may still prohibit dogs.
Trail etiquette and decisions on the trail
At the trailhead, compare the map with the signs. Note your starting point and check the first junction before walking. Stop walking before you check the map or take a photo, especially on rough footing.
Trail etiquette starts with leaving space for others. Follow posted right-of-way instructions, yield to uphill walkers where safe and choose a durable place to step aside. Stay on the established path, including around switchbacks. Keep music private and carry out wrappers and food scraps.
Leave No Trace provides the wider outdoor ethics guidance: avoid disturbing wildlife, leave natural objects where they are and follow local waste rules. Find out about toilets before departure and carry the supplies the site requires.
Turn around when the day stops matching the plan
A blocked path, uncertain junction or unexpected water crossing is a decision point. Stop and assess. Do not cross floodwater, scramble around a closure or continue toward a destination simply because it is close. Check in with everyone before adding distance.
If you lose the trail or need help
Stop moving and calmly check the map and known landmarks. If you cannot confidently identify a safe way back, stay put unless the location poses an immediate danger. In the US, call 911 for an emergency when you have service, or use your satellite emergency device if carried. Give your location or coordinates, trail name and the problem. Keep the group together and protect yourselves from exposure while waiting.
The NPS outdoor emergency plan explains what information rescuers need. Do not wander looking for a signal or assume a downhill stream will lead to safety.
Before you leave: a first-hike checklist
Use this final check after packing. The boxes save on this device; print a copy if you want the plan beside your map.
Trip-planning guides
The linked packing and navigation guides explain the equipment and map skills in more detail. This series will expand the planning skills introduced here.
- Hiking timeDistance, climb and a realistic return allowance.Coming soon
- Trail difficultyRead ratings and elevation gain together.Coming soon
- Training for hikingBuild walking fitness for the trail.Coming soon
- Hiking with dogsCheck access rules and plan for your dog’s needs.Coming soon
- Hiking with kidsChoose an outing the whole family can enjoy.Coming soon
Hiking for beginners: questions
How to start hiking: what should I do first?
Pick a nearby, maintained trail within distances you already walk easily. Check the full route and current conditions, go with a willing companion and pack for delays. Leave your route and return plan with someone at home. Make the first outing easy to shorten.
How long should a beginner hike be?
There is no universal distance. California State Parks suggests 1–2 miles on easy terrain with little climbing as a beginner option. Choose less if that exceeds your current comfortable walking range, and check that the mileage covers the return too.
What does a beginner hiker need?
A suitable route, comfortable footwear, a carrying pack and equipment matched to the conditions. Include navigation, water, food, sun protection, extra clothing, light, first aid, repair tools, emergency shelter and permitted fire-starting supplies. Know how to use what you carry.
What is the 3 layer rule for hiking?
A base layer manages moisture, a middle layer provides insulation and an outer shell protects against wind or rain. Adjust them as conditions and effort change; you do not need to wear every layer throughout a warm uphill walk.
Can I start hiking if I am out of shape?
Start with a gentle route within your current walking ability, even if that is a short paved park path. Repeat comfortable walks before adding distance or hills. A first hike is a chance to learn your pace; you can turn back early.
Can I go on my first hike alone?
A companion is the better first choice because you can help each other. If going alone, use a straightforward maintained trail within your abilities, share a detailed trip plan and prepare for limited phone coverage. Do not rely on meeting other hikers.
How much should you hike in a day?
Choose the amount your whole group can finish with energy, water and daylight to spare. Total distance, climbing, surface, weather and the return all matter. Use your own comfortable walks and the land manager’s route information instead of a fixed daily target.